Tonight I completed stripping the wallpaper off the door end of the right-hand external wall. Again, it was much more time consuming than anticipated - and was still faced with exposing the very strange puke-green colour - who on earth would have selected that colour? Wonder how long ago it was put on?


This is the result after 90 mins work with the steamer.. it was much more difficult than I expected. There is a lining paper.. and strong glue... and a strange colour underneath on the top half. So I had to do two steamings - one for the main paper, one for the lining paper. At least it is some progress.

I am working each night this week on an area of wall to strip the wall paper. This is the external wall on the right as you come in the door - it used to be part of the hallway before I knocked the internal wall down.

Before I stopped for the day I also used the steamer to remove the wallpaper on the stairs. I will need to do this for all the walls that have wallpaper in the living room and on the upstairs landing. I will do this this week in the evenings.

I then cut the carpet in front of the appliances and rolled it up.. it is on the left .. to reveal blue tiles on the floor .. on top of ashfelt. I will need to take these up, I think - will need to use heat .. probably an iron rather than the steamer.

This is the right hand side after everything had been stripped off the wall.

There were 3 large bags of rubbish and 1 small white one. I took them to the tip just before it closed at 5. You can see the old carpet that I had lifted on the left hand side.

This is the last area of tiles I had to do on the right hand side, although I still had to strip the wallpaper.

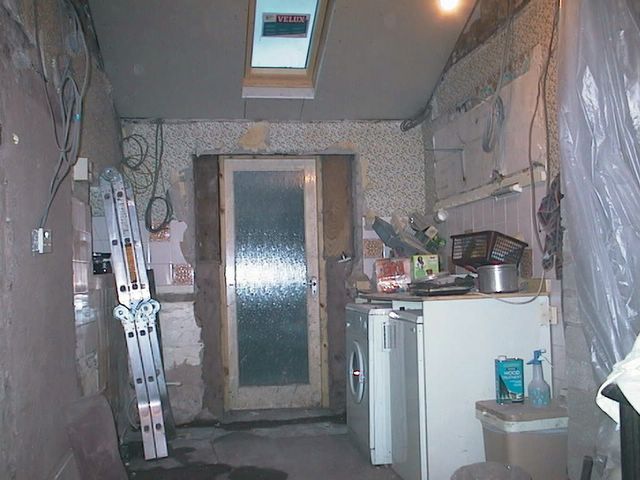
This is the wider view of the right hand side - with the paper to be taken off and an old socket at the far end (the nearest one is a temparary one that Steve put in).

This afternoon I started stripping off the wallpaper and tiles and old electrical sockets in the kitchen so Martin has a clear run on whatever he needs to do to plaster the walls. This is the left hand side after I had done most of this - lots of rubbish on the floor.

The mess in the back yard keeps getting bigger - it looks like a battle field from the Somme. I hope to start cleaning it up this weekend.

This is the view of the kitchen now - with the ceiling boarded and the old kitchen cabinets off the wall on the right and the sink and cooker taken out on the left. What a difference.
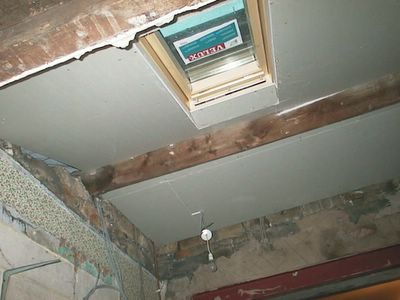
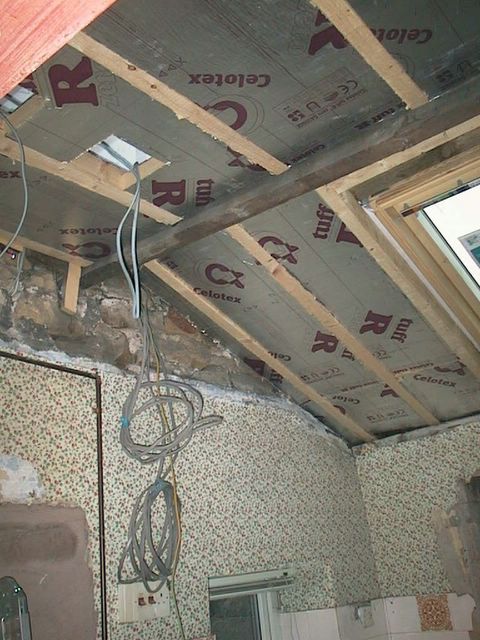
In the afternoon Lee finished boarding the ceiling inside the kitchen. It really does look good and feels significantly warmer with the insulation.

Lee spent the morning completing the laying of the roof tiles. This is the finished job. The guttering will be replaced when the new conservatory is added on the side.

These are the hot and cold water pipes coming up on the other side and attached to the old copper pipes.

This is what the area where the old sink was looks like now. On theleft (just the the right of the ladder) you can see the lead water main pipe coming up out of the floor. About 1 meter along you can just see the main cold water input tap. Then you have the white plastic pipes (the hot one hanging loose as that will evenutally feed the new sink) going under the floor into a plastic tube covering. The damp concrete which they used to cover the tube in the channel is visible.

You can see the wooden base of the sink in bits in the dining room, together with the old cooker and the small drier. I gave the sink top to the plumbers so that is not in the photo.

Then two young guys from BBH, the plumbers, came and took out the sink, which was where the guy on the left in kneeling. I will have to fill the kettle upstairs and wash pots upstairs for a few weeks. Then they started drilling a channel so that the water pipes could be laid underground.

First thing that happened today was that I took the copper gas piping that used to go to the cooker off the wall. You can see the old bracket (just) midway up the photo to the right. I also took it off the wall in the living room, where it had come from the bedroom down the top of the wall then through into the kitchen . You can see the difference if you compare this photo with other earlier ones

This shows the new beams and a better view of the angled lower part of the new ceiling. Steve is coming to clip the electrical cables later tonight.

These are some of the old tiles that will have to be replaced - called Spanish tiles - not sure if they actually come from Spain.

This is the view from outside, with the new roof window, the relined (and water tight) roof, and partially re-tiled.

Lee spent the day putting 4 new beams in the roof, installing a VELUX window and insulating the inside of the ceiling. He also relined the roof and started re-tiling the roof. It is all looking very different now :)

This is the same side from the other end of the kitchen.

And this is the other side. You can see the extra drawer cabinet where the fridge/freezer was originally.